Slow Cooker Beef Neck Bones Recipe
Slow Cooker Beef Neck Bones Recipe: Rich Broth, Cooking Time, and Meat Tips

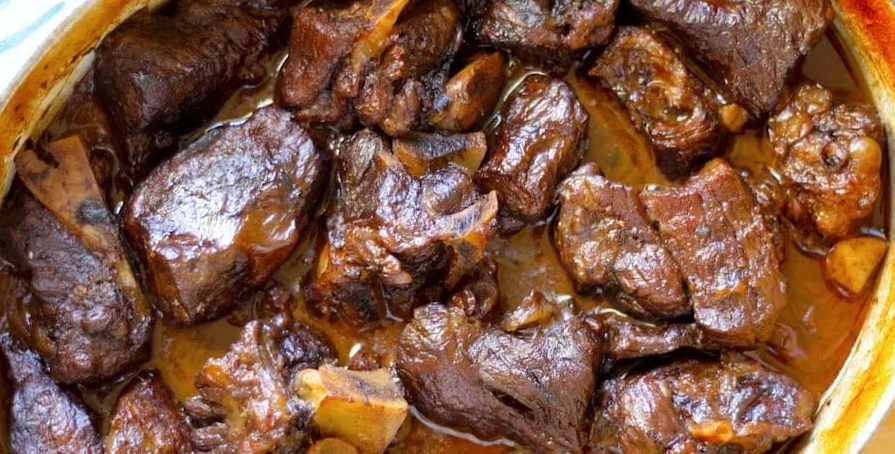
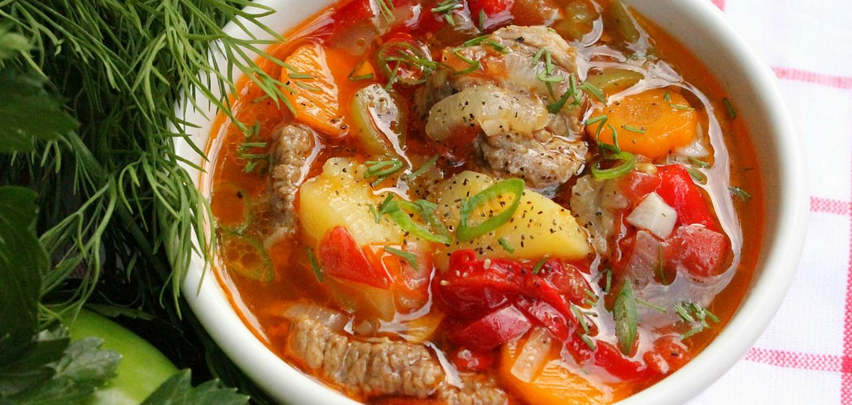
Beef neck bones are one of the most underappreciated cuts in the butcher’s case, but I’ve learned through years in professional kitchens and at home that they are an absolute treasure. They’re rich in connective tissue, bone marrow, and flavor, and when cooked low and slow in a moist environment—especially in a slow cooker—they yield meat that’s fall-off-the-bone tender and broth that’s deep, silky, and packed with nutrients.
- Why Beef Neck Bones Are Worth Cooking
- Ingredients and Equipment You’ll Need
- How to Choose and Prep Beef Neck Bones
- Searing the Bones for Maximum Flavor
- Building Flavor in the Slow Cooker
- Slow Cooker Time and Temperature Guide
- How to Finish the Dish
- Using the Broth: Soup, Stew, or Base
- Oven Method for Braising Neck Bones
- Stovetop Simmering for Deep Flavor
- Pressure Cooking for Speed
- Reheating and Storage Tips
- Common Mistakes and How to Avoid Them
- Sauce and Seasoning Ideas for Neck Bones
- Recipe Variations to Try
- Making Beef Neck Bones for Meal Prep or a Crowd
- Why This Recipe Always Delivers
- FAQ: 15 Real Questions About Beef Neck Bones (With Chef’s Personal Tips)

Why Beef Neck Bones Are Worth Cooking
This isn’t a quick cut. It’s one that rewards patience. But once you’ve mastered it, you’ll return to it again and again—for soups, stews, rice dishes, or simply as a centerpiece with crusty bread and greens. The cost is low, the flavor is high, and the result is unforgettable.
Ingredients and Equipment You’ll Need
Ingredients:
- 3 to 4 pounds beef neck bones
- Salt and black pepper
- 1 tablespoon oil for searing
- 1 onion, chopped
- 4 cloves garlic, smashed
- 2 tablespoons tomato paste
- 2 carrots, chopped (optional)
- 2 celery stalks, chopped (optional)
- 6 cups water or beef broth
- 1 tablespoon apple cider vinegar (helps extract minerals from bones)
- 1 bay leaf
- Fresh thyme or rosemary
Equipment:
- 6- to 8-quart slow cooker
- Cast iron skillet or sauté pan
- Tongs, ladle, slotted spoon
- Fine mesh strainer
- Large bowl for broth
- Thermometer (optional)
How to Choose and Prep Beef Neck Bones
When I shop for beef neck bones, I look for thick, meaty pieces with visible marrow and a good ratio of lean to bone. Ideally, they’re cut into rounds or cross-sections. Some pieces have more meat, others more bone—but both are useful. The bones give you broth; the meat gives you texture and satisfaction.
Before cooking, I rinse the neck bones under cold water to remove any loose bone fragments. I then pat them dry with paper towels. Dry bones sear better, which deepens flavor and color. I season them liberally with salt and pepper—don’t be shy here, the bones can handle it.
Searing the Bones for Maximum Flavor
Searing isn’t optional in my kitchen—not when you want rich, complex flavor. I heat a cast iron pan until very hot, add oil, and brown the neck bones on all sides. This step creates a layer of fond (brown bits) that is pure flavor gold.
Once the bones are browned, I remove them and sauté onion, garlic, and tomato paste in the same pan. This mixture gets caramelized and slightly dark before I deglaze with a splash of broth or water. The goal here is to lift every bit of flavor from the bottom of the pan before transferring it all into the slow cooker.
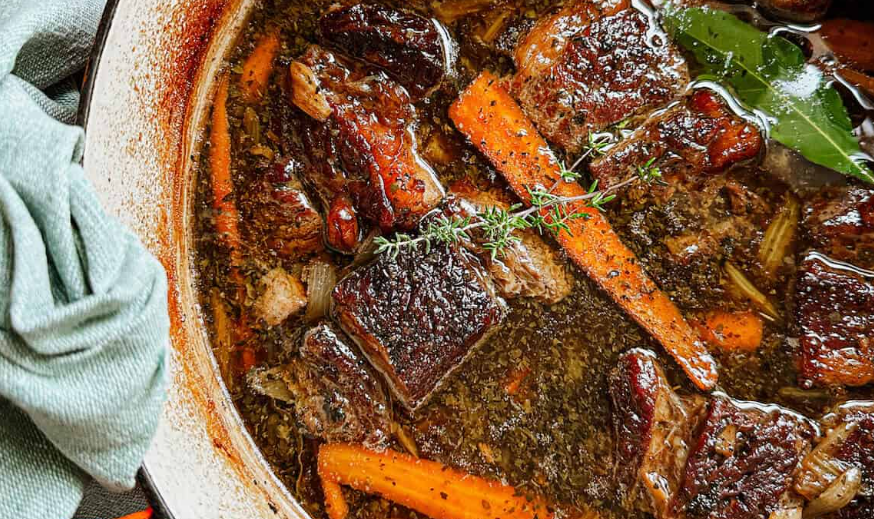
Building Flavor in the Slow Cooker
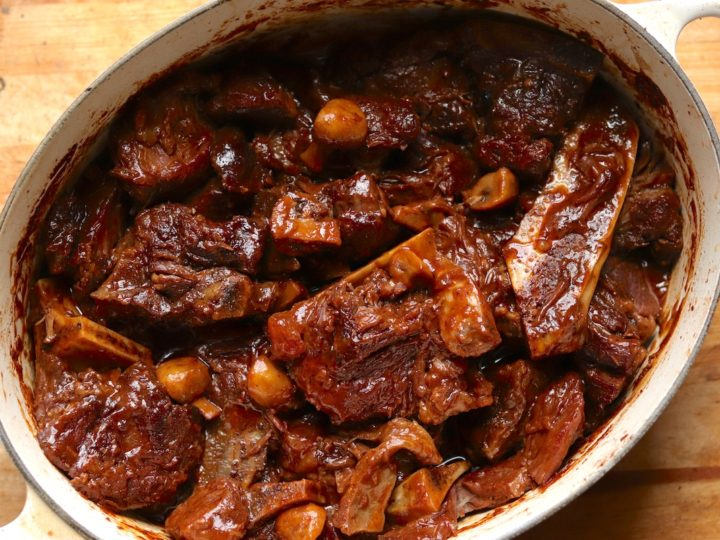
I place the seared bones in the bottom of the slow cooker, then pour over the sautéed vegetables and liquid. I add my herbs, bay leaf, a splash of vinegar, and just enough broth or water to cover the bones. I never fill the cooker to the brim—leave at least an inch of space at the top.
If I’m making broth, I leave it very simple—just bones, aromatics, and water. If I’m making a meal out of the bones, I’ll add carrots, celery, and maybe a spoonful of Worcestershire or soy sauce to deepen the umami.
Slow Cooker Time and Temperature Guide
| Setting | Time | Doneness Indicator |
| Low | 8–10 hours | Meat falls off the bone |
| High | 4–5 hours | Pulls apart with fork |
| Warm | Up to 4 hours | For holding before serving |
I always use low heat if time allows—it gives the best flavor and texture. The longer it cooks, the richer the broth and the softer the meat.
How to Finish the Dish
After cooking, I use tongs to carefully lift the bones from the broth. The meat is incredibly tender and may fall off as you lift, so I do this over a bowl or tray. I remove any large pieces of fat or gristle, then separate the usable meat with clean hands or two forks.
The broth can be used as-is or strained for clarity. If I’m using it in soup, I return the shredded meat and season to taste with salt and a touch of acid—vinegar or lemon juice—to bring it to life.
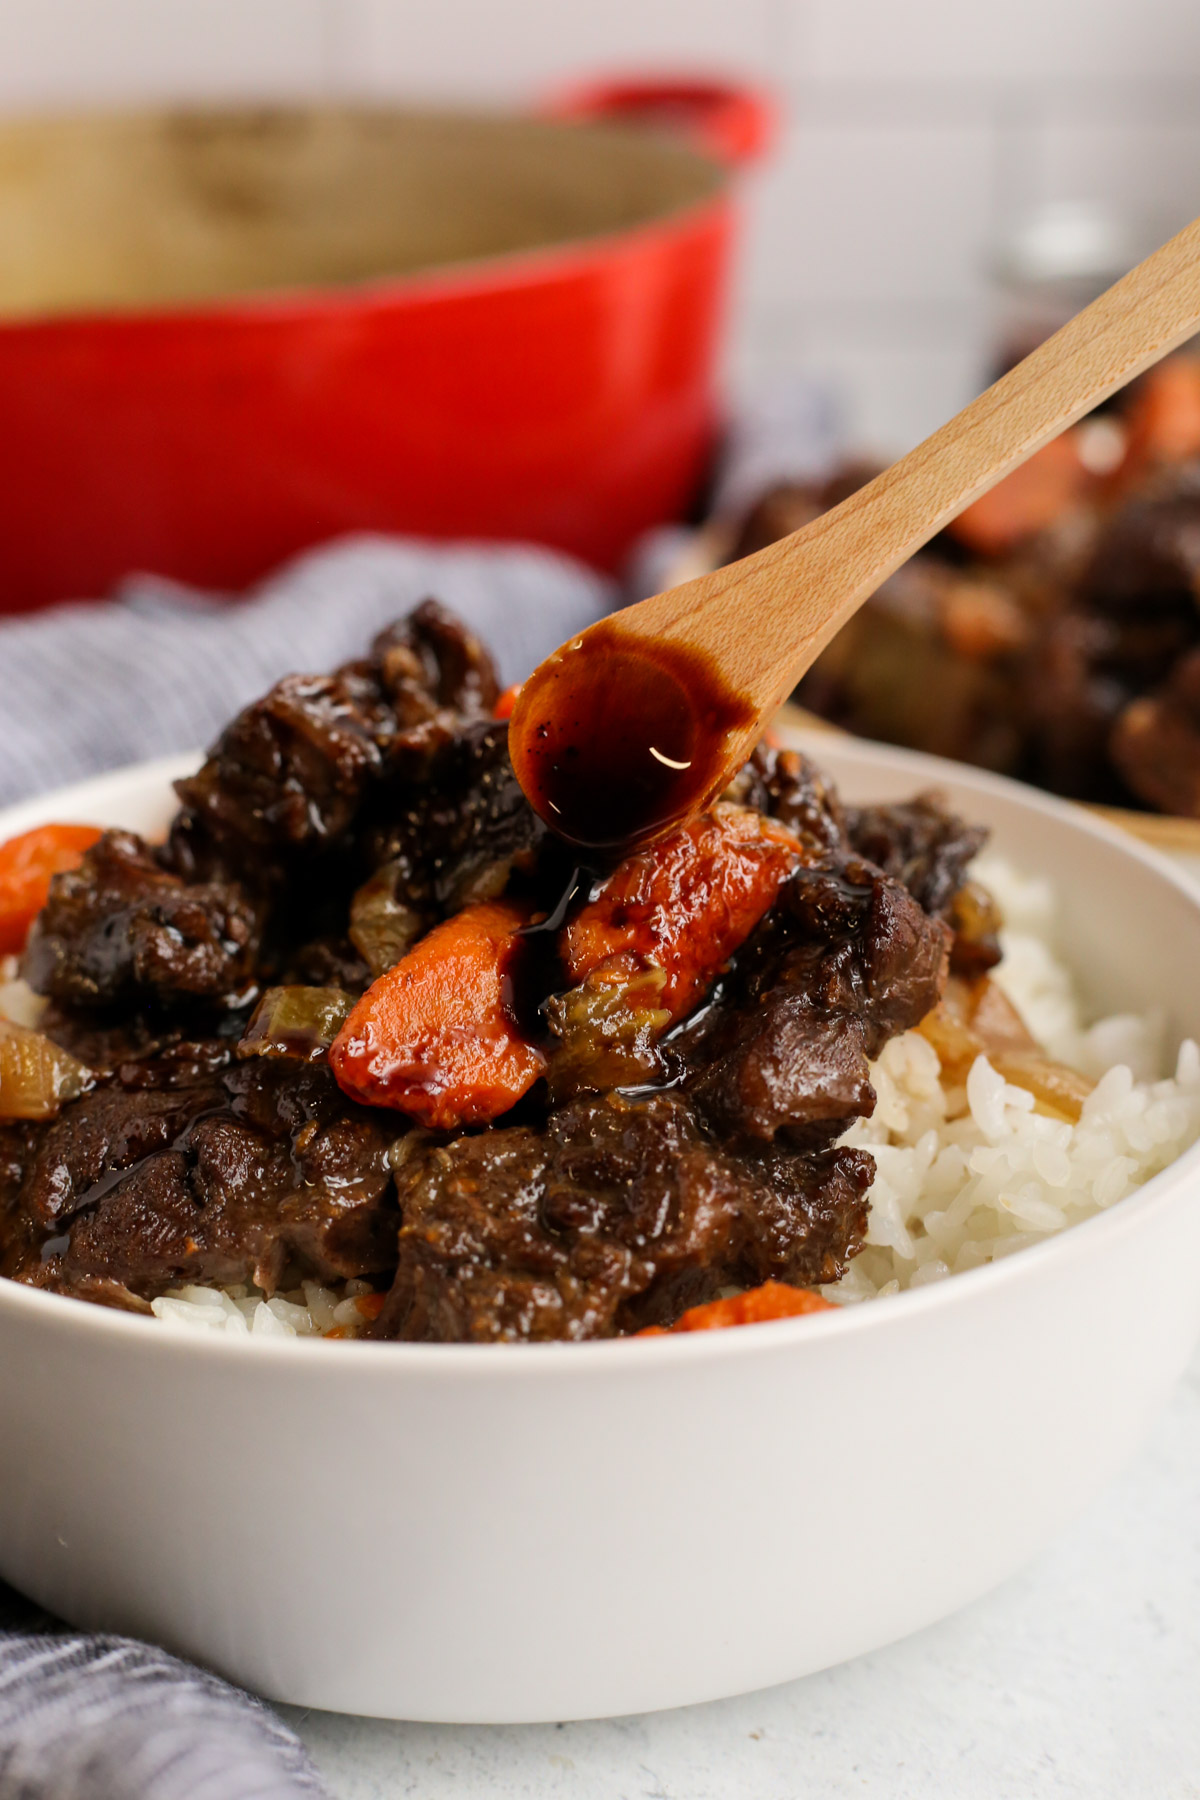
If I’m serving the meat alone, I reduce the broth in a saucepan for 10–15 minutes until it thickens slightly, then ladle it over the meat for added flavor.
Using the Broth: Soup, Stew, or Base
The broth you get from neck bones is incredibly gelatinous and mineral-rich. I often chill it overnight, skim the fat (or save it for frying), and use the broth throughout the week. It works beautifully in:
- Soups with barley or rice
- Beef stew with root vegetables
- Risottos and grain bowls
- As a base for ramen or pho-style noodles
I’ve even frozen the broth in ice cube trays for quick flavor boosters when cooking vegetables or sauces.
Oven Method for Braising Neck Bones
If you don’t have a slow cooker, the oven works beautifully for beef neck bones. I use a Dutch oven with a tight-fitting lid and follow the same prep steps: sear the bones, sauté the aromatics, deglaze, and return everything to the pot. I add enough liquid to cover the bones halfway, then cover tightly and braise in the oven at 300°F (150°C) for 3½ to 4 hours.
Oven braising gives slightly more evaporation than a slow cooker, which means a more concentrated broth if left uncovered near the end. I sometimes remove the lid for the last 30 minutes to reduce the sauce slightly, depending on how I want to serve it.
Stovetop Simmering for Deep Flavor
I’ve cooked neck bones on the stovetop many times when I didn’t want to use the oven or slow cooker. After searing and layering flavor, I bring the pot to a simmer over medium heat. Once simmering, I reduce to low, cover tightly, and cook for 3 to 4 hours, checking occasionally to ensure the liquid level stays consistent.
This method requires more attention than the slow cooker, but it works well. I rotate the bones halfway through to ensure even cooking. The broth tends to reduce more, so I often top it up with a bit of hot water or broth during the process.
Pressure Cooking for Speed
If I need beef neck bones cooked fast, the pressure cooker is my tool of choice. I sear the bones right in the pot (if the model allows), sauté the onions and tomato paste, then add liquid and herbs. I seal the lid and cook on high pressure for 45–50 minutes, followed by natural release for 15 minutes.
The meat is extremely tender, and the broth is strong, though slightly less nuanced than when slow cooked. I recommend reducing the broth after cooking if you want it thicker or bolder. This method is perfect for weeknights or last-minute meal prep.
Reheating and Storage Tips
After cooking neck bones for hours, the last thing I want is to ruin the texture or flavor during storage or reheating. That’s why I always cool the meat and broth to room temperature before transferring them to storage containers. I prefer separating the meat from the broth for flexibility. I often shred the meat while it’s still warm—it pulls apart easily with my hands or a fork.
For the broth, I pour it through a fine mesh strainer to remove solids. Once cooled in the fridge, the fat rises to the top and solidifies, forming a natural protective layer. You can skim it off if you want a lighter broth or keep it for reheating—it adds flavor.
In the fridge, both meat and broth keep well for up to 4 days. For freezing, I portion the meat and broth separately in airtight containers or freezer bags. They’ll last up to 3 months. When I reheat, I always do it gently—either in a saucepan over low heat or, for the meat, with a splash of broth in the microwave at 50% power. This preserves the tenderness and avoids overcooking.
Common Mistakes and How to Avoid Them
I’ve seen a lot of things go wrong with beef neck bones—not because the cut is difficult, but because it’s misunderstood. The most common mistake is rushing the cook time. This is not a quick meal. Neck bones need long, moist cooking to break down collagen and extract flavor. Anything less than 4 hours and you’ll end up with chewy, flavorless meat.
Another mistake is skipping the sear. I know it’s tempting to just toss everything into the slow cooker, but trust me—searing the bones makes all the difference. That deep brown crust adds layers of flavor that you simply can’t get later.
I’ve also seen cooks overcrowd the pot, stacking bones too tightly. They cook unevenly that way. You need space for liquid to circulate. If I have too many bones, I split the batch into two cookers or pots. And finally, under-seasoning is a killer. Bones need salt early on to draw out flavor. I season before searing and always taste and adjust at the end.

Sauce and Seasoning Ideas for Neck Bones
One of my favorite things about beef neck bones is how well they absorb flavor. Once cooked, the meat is so tender and porous that even a light sauce clings beautifully. I often reduce the cooking broth into a rich sauce by simmering it on the stove until it thickens. To finish, I whisk in a tablespoon of cold butter—it gives the sauce a velvety body and sheen.
For more punch, I add a spoonful of mustard, soy sauce, or even fish sauce. Sometimes I stir in miso paste for deep umami or a few drops of sherry vinegar to brighten things up. For herbs, I lean on thyme, rosemary, or bay during cooking—but I finish with parsley or tarragon for freshness.
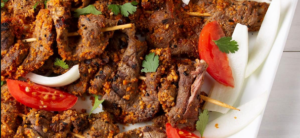
If I’m turning the meat into tacos or grain bowls, I season with warm spices—paprika, cumin, cinnamon—and drizzle with yogurt or chili oil. The key is balancing the richness of the meat with acidity, heat, or herbs to keep it lively.
Recipe Variations to Try
Beef neck bones are a blank canvas for global flavors. For a Southern-style version, I slow cook the bones with onions, garlic, and a splash of apple cider vinegar, then shred the meat and serve it over collard greens and cornbread. The broth becomes the gravy.
In Asian dishes, I go with soy sauce, ginger, garlic, and star anise. I’ve served this version over rice noodles with bok choy and scallions—comforting, fragrant, and full of warmth.
For an Italian take, I cook the bones in crushed tomatoes, red wine, garlic, and basil. Once tender, I toss the meat and sauce with rigatoni or spoon it over creamy polenta. A dusting of Parmigiano Reggiano on top makes it unforgettable.
Even Caribbean-style works: I rub the bones with jerk seasoning, sear them, then slow cook with thyme, allspice, onions, and Scotch bonnet. The result is spicy, aromatic, and finger-licking good. This cut handles bold flavors better than most.
Making Beef Neck Bones for Meal Prep or a Crowd
This is one of my favorite cuts for meal prep and bulk cooking. Neck bones are inexpensive, rich in flavor, and easy to stretch across multiple dishes. I cook a full batch—usually 4 pounds at once—then separate the shredded meat into portions for different uses. Some goes into soup, some for tacos, some over rice or pasta.
The broth becomes its own ingredient. I strain and freeze it in quart containers or even in ice cube trays for small boosts of flavor. During a busy week, I’ll use the broth to braise vegetables, make grains, or enrich stews. One pot of neck bones can feed you for days if portioned properly.
For crowds, I use a large oval slow cooker and serve the meat shredded buffet-style. I pair it with sandwich rolls, slaw, and sauces, letting guests build their own plates. It’s cost-effective, easy to keep warm, and always a hit.
Why This Recipe Always Delivers
Beef neck bones represent everything I love about slow cooking—transforming humble ingredients into something beautiful. The combination of meat, marrow, and connective tissue creates both a main course and a broth full of depth. No fancy tools, no expensive cuts—just time, heat, and care.
This recipe works every time because it respects the cut. We build flavor at every step—through searing, aromatics, herbs, and controlled heat. Whether you’re making stew, soup, or something new, the neck bones do the work. You just have to be patient and trust the process.
The end result is always worth it: tender meat, a rich broth, and a kitchen filled with the kind of aroma that makes people gather and stay. That, to me, is real cooking.
FAQ: 15 Real Questions About Beef Neck Bones (With Chef’s Personal Tips)
Do I have to sear beef neck bones before slow cooking?
Yes, and I strongly recommend it. I’ve tried both ways, and searing makes a massive difference in both flavor and color. The Maillard reaction from browning creates a deep, savory base that enriches the entire dish. When I’m short on time, I still make a point to sear—just a few minutes per side is enough to build complexity.
Can I cook beef neck bones from frozen?
I’ve done it in emergencies, but I don’t recommend it. Frozen bones release water quickly and lower the cooking temperature, which weakens both the sear and flavor. I always thaw overnight in the fridge. That way, I can season and brown them properly and get better texture and taste.
How do I know when neck bones are done?
I always check for tenderness. The meat should fall off the bone with a gentle pull or wiggle. If I see resistance, I cook longer—at least another 30–60 minutes. The magic happens after 6–8 hours on low. Don’t rush it. I never go by time alone—feel is key.
What’s the best liquid for cooking neck bones?
I use water when I want a clean, mineral-rich broth. For more flavor, I combine water with beef stock, wine, or a splash of soy sauce. Sometimes I use tomato paste or vinegar for acidity. I’ve found the bones will carry the dish—liquid just supports them.
Can I eat the marrow from beef neck bones?
Absolutely, and I encourage it. The marrow is rich in nutrients and flavor. After cooking, I use a small spoon to scoop it out and stir it into the sauce or spread it on toast. It’s deeply satisfying and adds velvety texture. I’ve even blended it into mashed potatoes.
What’s the difference between neck bones and oxtail?
They’re similar, but oxtail is fattier and has a rounder bone structure. Neck bones are more fibrous but have just as much flavor. I use them interchangeably in recipes like stew or broth. Neck bones are often more affordable and just as rewarding when cooked properly.
Should I remove the meat from the bones before serving?
It depends on presentation. For soup or casual meals, I shred the meat off the bones so it’s easier to eat. But for rustic dishes, I sometimes serve the bones whole on the plate—it looks great and lets guests dig in with their hands or forks. Just warn them about small bone fragments.
Can I use the broth for more than just soup?
Definitely. I’ve used neck bone broth in risotto, for braising vegetables, as a base for sauces, or even just as a sipping broth. It’s full of collagen and flavor. Sometimes I reduce it to a glaze and spoon it over steak or roasted mushrooms. It’s liquid gold.
How do I make the broth less greasy?
After cooking, I chill the broth in the fridge overnight. The fat rises to the top and solidifies. I skim it off with a spoon the next day. If I’m in a hurry, I use a ladle to skim off the fat while it’s still hot, or let the broth settle and pour slowly. Removing the fat gives a cleaner taste, but I save it for frying eggs or vegetables.
What are some good side dishes for beef neck bones?
I recommend serving with mashed potatoes, polenta, or steamed rice—something that will soak up the sauce. Roasted vegetables or bitter greens like kale or collards add contrast. When I want something lighter, I do a cucumber salad or pickled onions on the side.
Can I pressure cook neck bones?
Yes, and I’ve done it many times. It takes about 45–50 minutes at high pressure with natural release. The meat gets tender fast, though the broth isn’t quite as layered as in slow cooking. I often reduce the liquid after for more depth. Perfect for weeknight cooking.
How much meat can I expect from 4 pounds of neck bones?
Not a lot, and that’s important to understand. From 4 pounds, I usually get 1.5 to 2 pounds of usable meat. The bones and cartilage make up much of the weight. But the flavor and broth you get make it more than worth it. I always buy a little extra for meal prep.
What do you do with leftover neck bone meat?
I shred it and store it in small containers with broth. It reheats beautifully and works in tacos, rice bowls, pasta, or even sandwiches. One of my favorite uses is making beef fried rice with the leftovers—it’s quick, savory, and incredibly satisfying.
Can I reuse neck bones for a second batch of broth?
Technically yes, but I don’t. Most of the flavor and collagen is extracted in the first round. A second batch will be weak unless you combine it with fresh bones. If I’m after intense flavor, I always start with a new batch of bones and build it from scratch.
What’s your number one tip for cooking neck bones?
Be patient and don’t rush the process. Let the bones brown well, build layers of flavor, and give it time. Low and slow is the secret. I’ve cooked this dish for years, and every time I do it right, I’m reminded how something so simple can taste so luxurious. Trust the process—it always pays off.
Post Comment