Beef Кump in Slow Cooker
Beef Rump in Slow Cooker: Step-by-Step Roast Recipe with Cooking Time and Temperature

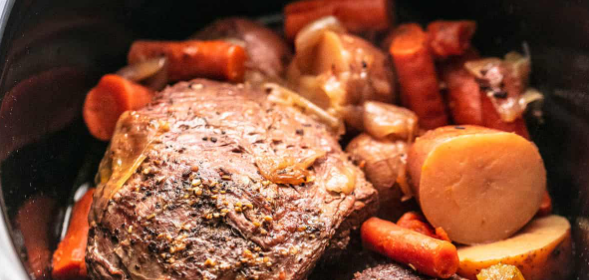
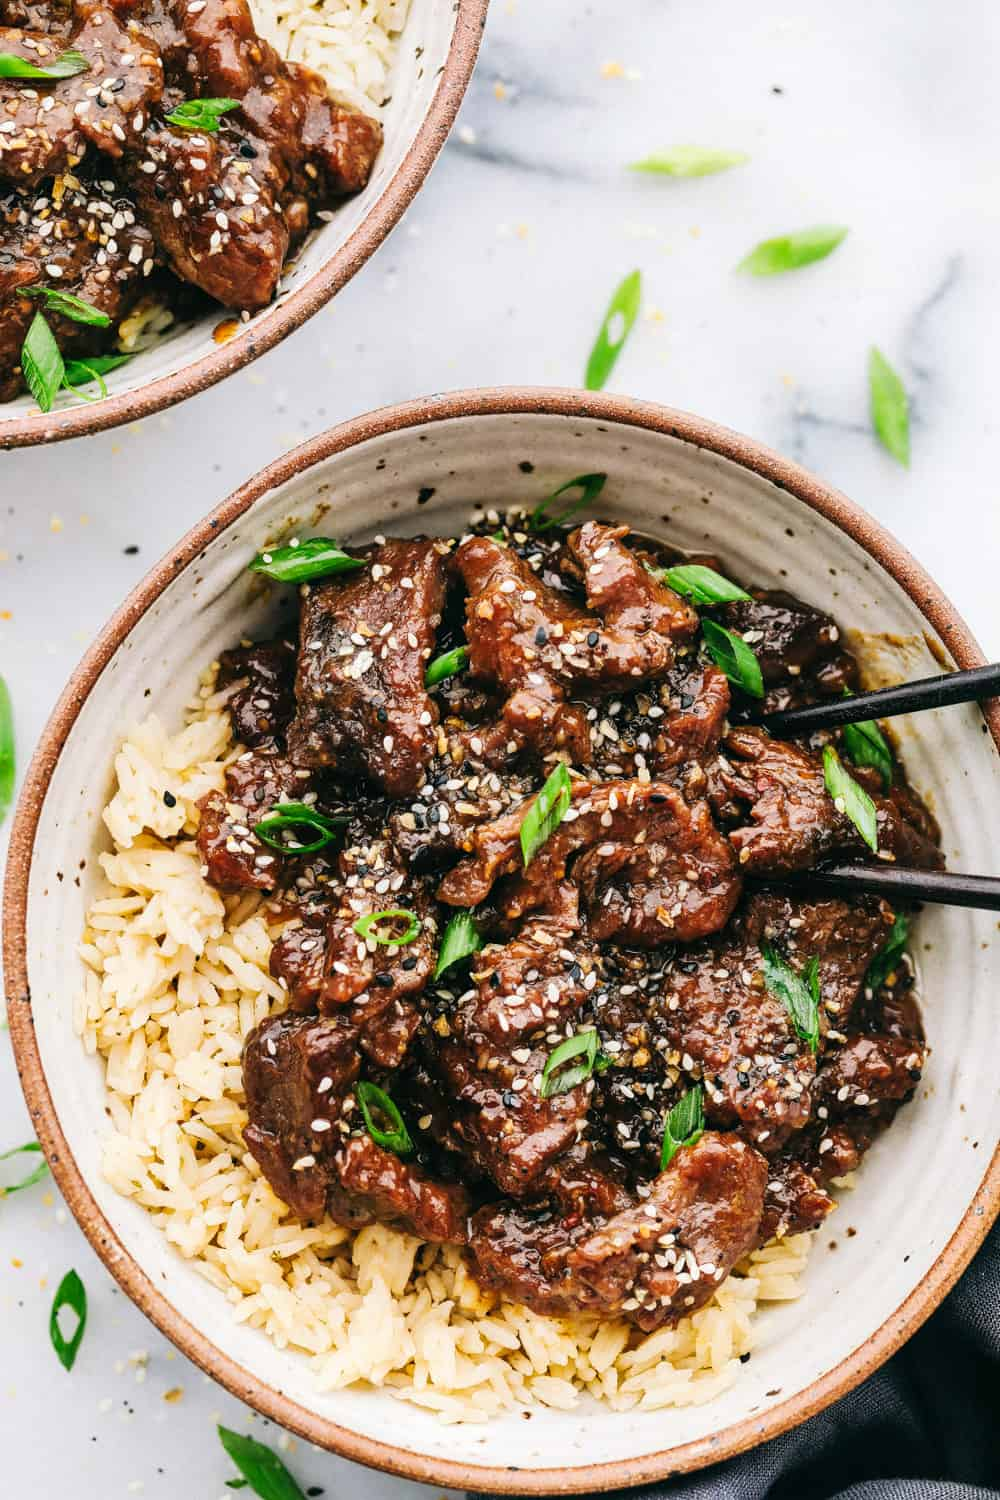
Beef rump is a lean, flavorful cut that benefits enormously from slow, moist cooking. In my experience, it’s one of the most misunderstood cuts—many home cooks fear it will turn out tough or dry. But when treated properly in a slow cooker, it transforms into an incredibly tender, flavorful roast that slices beautifully or shreds effortlessly, depending on your approach.
- Why Slow Cooking Is Perfect for Beef Rump Roast
- Ingredients and Equipment You’ll Need
- Preparing the Rump Roast: The Importance of a Good Sear
- How to Slow Cook Beef Rump Roast: My Full Step-by-Step Method
- Internal Temperature and Cooking Time Chart
- Using a Pressure Cooker: When You Need It Fast
- Oven Method: A Reliable Alternative with Great Control
- Stovetop Method: Hands-On but Effective
- Can You Use the Microwave? Only for Reheating
- Sauce and Seasoning Combinations That Complement Rump Roast
- Mistakes to Avoid When Cooking Beef Rump in the Slow Cooker
- Flavor Variations I’ve Tested and Recommend
- How to Plate and Serve Like a Pro
- Storing and Reheating Stuffed Pork Chops
- Stuffed Pork Chops for Special Occasions
- Why This Recipe Works Every Time
- Adapting the Recipe for Dietary Needs
- Pairing Stuffed Pork Chops with Sides and Wines
- Making It Ahead: Tips for Meal Prep and Batch Cooking
- FAQ: 15 Real Questions About Stuffed Pork Chops (With My Professional Advice)
Why Slow Cooking Is Perfect for Beef Rump Roast
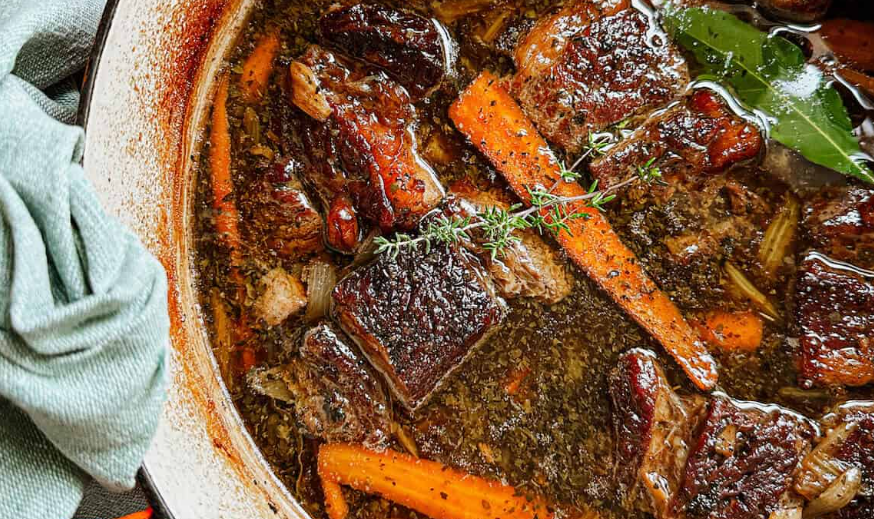
Unlike tenderloin or ribeye, rump roast needs time. The slow cooker provides gentle, even heat that slowly breaks down the muscle fibers while locking in natural juices. It’s a hands-off method that rewards patience. I often use this for Sunday dinners or meal prep—set it in the morning, and by evening, you have fork-tender meat, rich gravy, and a warm kitchen filled with savory aromas.
Ingredients and Equipment You’ll Need
To create the perfect slow cooker beef rump roast, here’s what I gather before starting:
Ingredients:
- 3–4 lb beef rump roast
- 2 tbsp olive oil
- Salt and black pepper
- 1 large onion, sliced
- 3 garlic cloves, smashed
- 1 tbsp tomato paste
- 1½ cups beef broth
- ¾ cup red wine or balsamic vinegar (optional for depth)
- 2 tbsp Worcestershire sauce
- 2 tsp Dijon mustard
- 1 tsp dried thyme
- 1 tsp dried rosemary
- 2 bay leaves
- Optional: carrots, celery, or potatoes for a one-pot meal
Equipment:
- 6–8 quart slow cooker
- Heavy skillet for searing
- Tongs and meat thermometer
- Ladle and fine-mesh strainer (for sauce)
- Small saucepan (for gravy)
Having these ready sets you up for smooth, efficient prep.
Preparing the Rump Roast: The Importance of a Good Sear
Even though you’re using a slow cooker, I always take 10 minutes to sear the beef first. It’s one of the most important flavor-building steps you can take. I pat the roast dry, season generously with salt and pepper, and heat a heavy skillet with oil until just shimmering. I sear the beef on all sides until a golden crust forms. This caramelization adds richness to both the meat and the final sauce.
Once seared, I remove the meat and sauté onions and garlic in the same pan, scraping up the browned bits. I stir in tomato paste and let it darken slightly—this builds umami. Then I pour in the red wine or vinegar, letting it simmer for a minute before transferring everything to the slow cooker along with broth, Worcestershire, herbs, and mustard.
How to Slow Cook Beef Rump Roast: My Full Step-by-Step Method
Once the meat and aromatics are in the cooker, I set it to low and let it cook undisturbed for 8 to 10 hours, or on high for 4 to 5 hours if pressed for time. That said, I almost always prefer the low setting—it produces a silkier texture, especially for leaner cuts like rump.
I avoid opening the lid during cooking unless absolutely necessary. Each time you lift the lid, you lose heat and add time. After about 7–8 hours on low, I test the meat with a fork—it should slide in with no resistance. If I want slices, I pull the meat at around 190°F. For shredded beef, I let it go to 200–205°F.
Once done, I remove the meat to rest and turn my attention to making a perfect gravy with the cooking liquid.
Internal Temperature and Cooking Time Chart
Rump roast responds differently depending on your desired texture—whether you want clean slices or soft, shreddable meat. While I always recommend a thermometer for precision, here’s a temperature chart I use in my kitchen to guide timing and doneness:
| Internal Temp | Texture | Cook Time in Slow Cooker (Low) | Notes |
| 135°F (57°C) | Medium-Rare Slices | Not suitable | Too underdone for slow cooking |
| 145°F (63°C) | Medium Slices | 6–7 hours | Still sliceable but may be firm |
| 190°F (88°C) | Tender Roast Slices | 8–9 hours | Juicy and tender, great for carving |
| 200–205°F | Shreddable Texture | 9–10 hours | Perfect for pulled beef or sandwiches |
For slicing, I rest the meat for 20 minutes before cutting. For shredding, I let it sit in the warm liquid for another 30 minutes to soak up extra flavor.
Using a Pressure Cooker: When You Need It Fast
When I’m short on time or prepping for next-day service, I often use a pressure cooker to prepare beef rump roast. I follow the same searing and deglazing process, but instead of placing it in the slow cooker, I transfer everything into the pressure cooker with liquid and herbs.
I seal the lid and cook on high pressure for 60 minutes, followed by a 15–20 minute natural release. The roast becomes incredibly tender—nearly indistinguishable from slow cooking—but the sauce can be thinner, so I reduce it on the stovetop for flavor.
While it lacks the slow cooker’s subtle depth, the pressure cooker excels when time is tight. I recommend it for meal prepping large batches or for busy weeknights.
Oven Method: A Reliable Alternative with Great Control
If I don’t have access to a slow cooker, I use the oven, which offers more control over browning and moisture. After searing the meat and building the sauce, I place everything in a Dutch oven or roasting pan, cover tightly with foil or a lid, and roast at 300°F (150°C) for 3.5 to 4.5 hours.
Halfway through, I baste the meat with the juices. For a bit more caramelization, I uncover the roast during the final 20–30 minutes. This approach delivers deep color and bold, concentrated flavors. I’ve used this method for years in professional kitchens when I need to develop crust and sauce simultaneously.
Stovetop Method: Hands-On but Effective
Cooking rump roast entirely on the stovetop takes more attention but can yield excellent results if done right. I sear the roast in a large Dutch oven, then lower the heat, add the liquid and aromatics, and cover tightly. I simmer it over very low heat for 3 to 4 hours, rotating the roast occasionally to ensure even cooking.
This method works best with a diffuser or heavy-bottomed pot to avoid scorching. I also keep an eye on liquid evaporation, adding broth as needed. The flavor becomes very rich due to the concentrated braising, but you need to stay close—it’s not as forgiving as a slow cooker.
Can You Use the Microwave? Only for Reheating
I never recommend cooking a rump roast in the microwave from raw. The uneven heating and lack of moisture control will leave the meat rubbery and underdeveloped in flavor. However, I’ve found the microwave useful for reheating small portions.
I always slice the roast first, place the pieces in a covered dish with a spoonful of gravy or broth, and reheat at 50% power in 30-second bursts, checking between intervals. For shredded roast, I cover it with a damp paper towel and stir halfway through. It’s not ideal—but with proper care, it works in a pinch.
Sauce and Seasoning Combinations That Complement Rump Roast
Rump roast has a deep, clean beef flavor that can handle bold, savory enhancements without losing its character. My base seasoning always includes kosher salt, black pepper, and garlic powder, but the supporting flavors come from the braising liquid. For traditional versions, I rely on red wine, Worcestershire sauce, and a touch of tomato paste—this creates a rich, classic roast profile.
If I want something brighter, I add balsamic vinegar and rosemary, which cut through the richness and add aromatic complexity. When I’m in the mood for something heartier, I include whole grain mustard and fresh thyme, building a rustic profile that pairs beautifully with root vegetables and mashed potatoes.
After cooking, I reduce the liquid in a saucepan and finish with cold butter or a dash of Dijon. This transforms the broth into a silky sauce that enhances every bite without overpowering it. I’ve even stirred in horseradish or cream at the end to create a more dynamic finish for special occasions.
Mistakes to Avoid When Cooking Beef Rump in the Slow Cooker
Even though the slow cooker is forgiving, I’ve seen a few recurring mistakes that can lead to bland, tough, or dry results. The most common is underseasoning. Because rump is lean and fairly dense, it needs assertive seasoning from the start. I always season the roast generously before and after searing.
Another mistake is skipping the sear. While it’s tempting to toss everything straight into the slow cooker, that crust adds complexity that you can’t recreate later. I also warn against using too much liquid—it should come up about halfway, not submerge the meat completely. Otherwise, you risk steaming rather than braising.
One more critical point: don’t slice the roast too soon after cooking. I rest it for at least 15–20 minutes under foil. Cutting too early lets all the juices escape, leaving dry slices. Patience, in this case, pays off with moist, tender meat.
Flavor Variations I’ve Tested and Recommend
Over the years, I’ve experimented with dozens of variations on rump roast—and these are the ones I come back to. For an herbed version, I use rosemary, thyme, lemon zest, and a splash of white wine in the broth. It creates a light, fragrant flavor that pairs well with spring vegetables like asparagus and peas.
In colder months, I often go for a deeper profile: caramelized onions, red wine, Dijon mustard, and a touch of cocoa powder in the sauce. That tiny bit of bitterness enhances the beef and gives the gravy richness without heaviness.
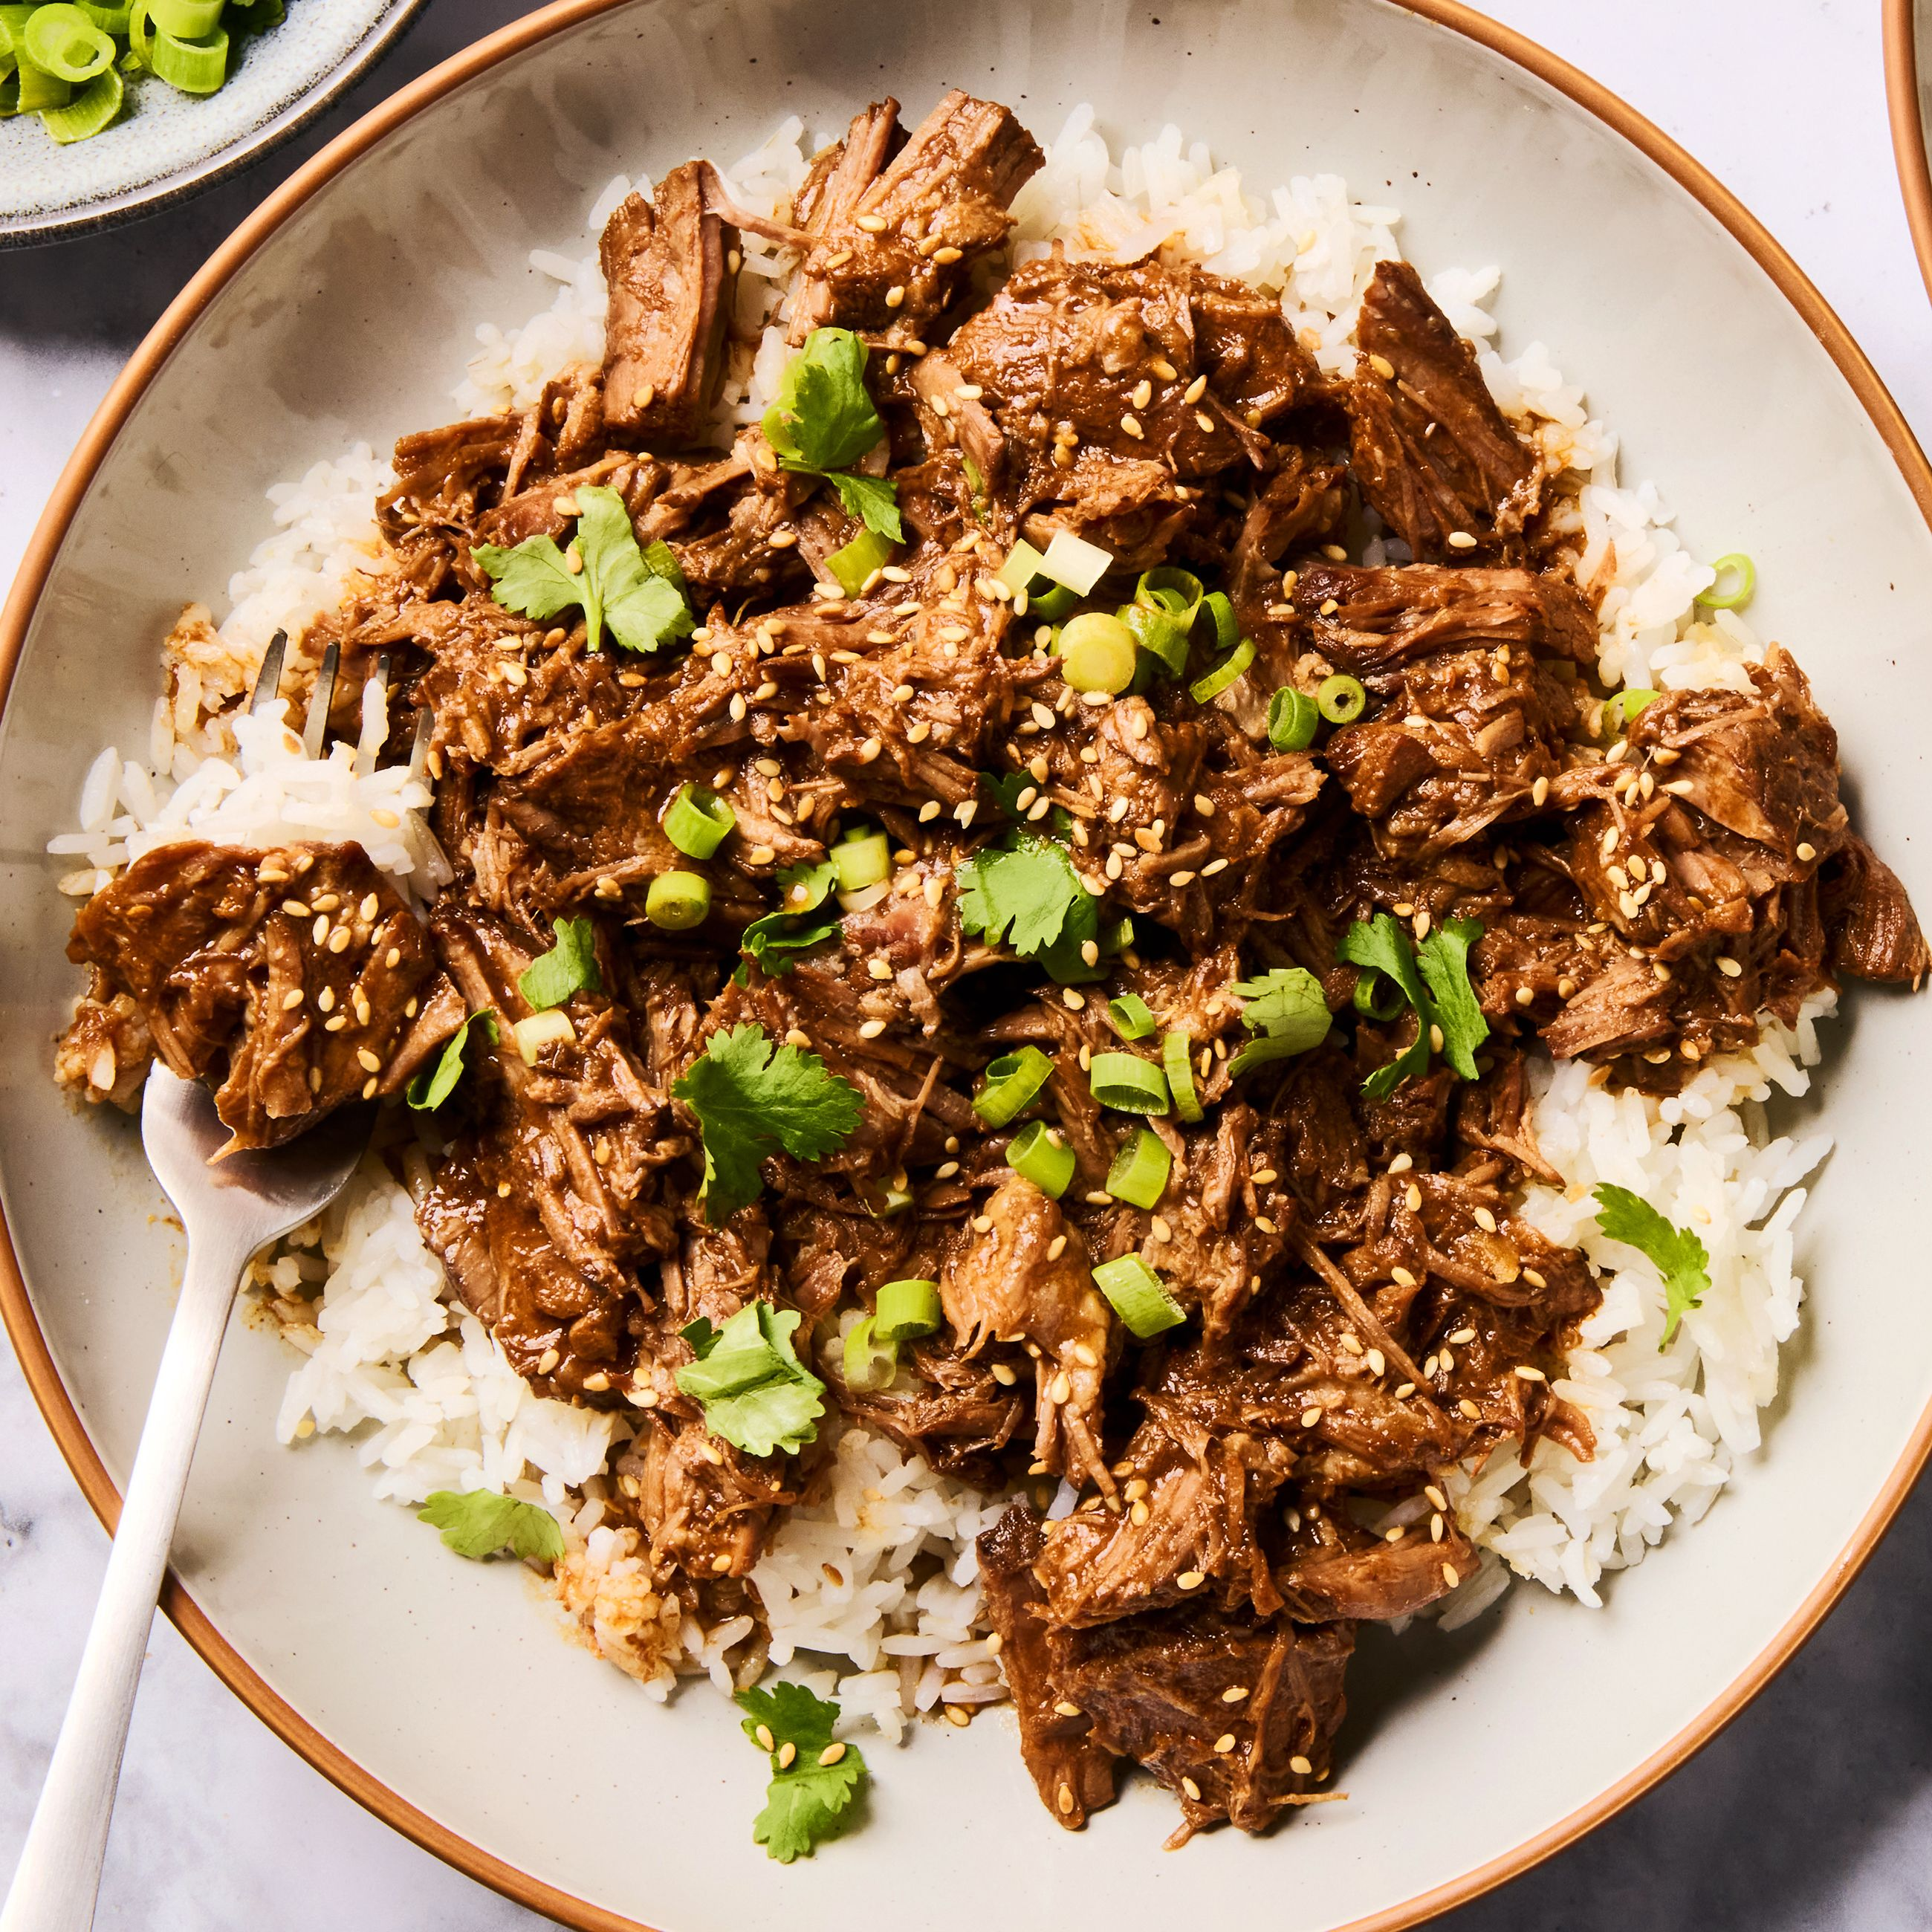
For something unexpected, I’ve made a Mediterranean-inspired version with sun-dried tomatoes, olives, oregano, and beef broth mixed with tomato sauce. The result is tangy, bold, and absolutely unforgettable served with couscous or crusty bread.
The beauty of rump roast is that it acts like a blank canvas. Once you master the cooking method, you can tailor the seasoning and sauce to fit any theme or occasion.
How to Plate and Serve Like a Pro
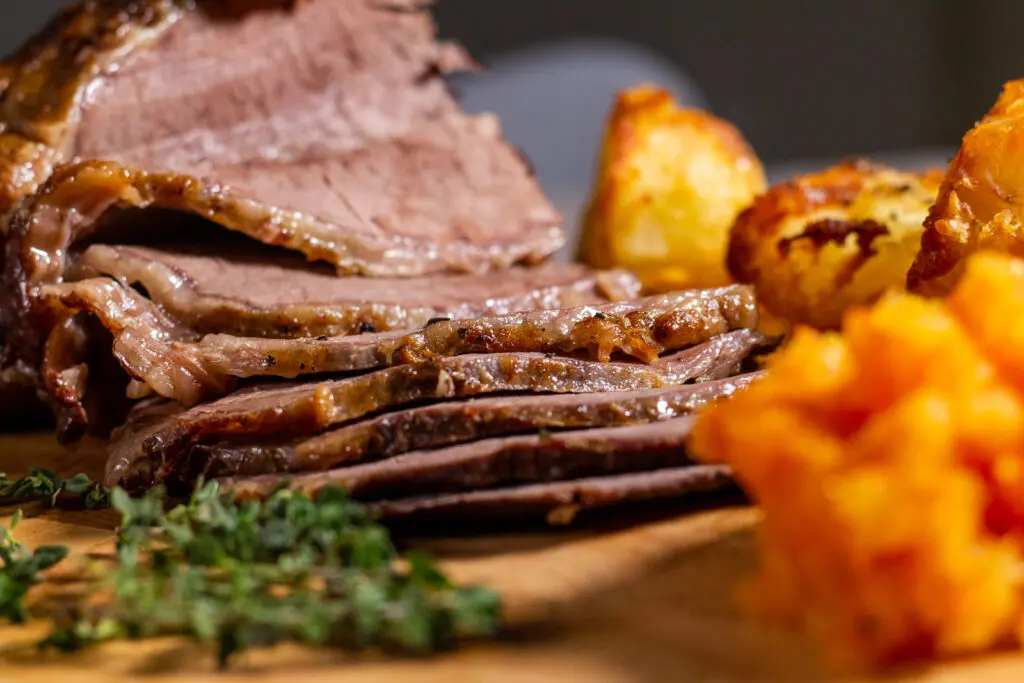
Presentation matters—even with something as rustic as rump roast. When I want clean slices, I let the meat rest, then carve it thinly against the grain using a sharp slicing knife. I lay the slices slightly overlapped on a warm serving platter and spoon sauce gently over or around the edges—not directly over the top unless I’m serving it family-style.
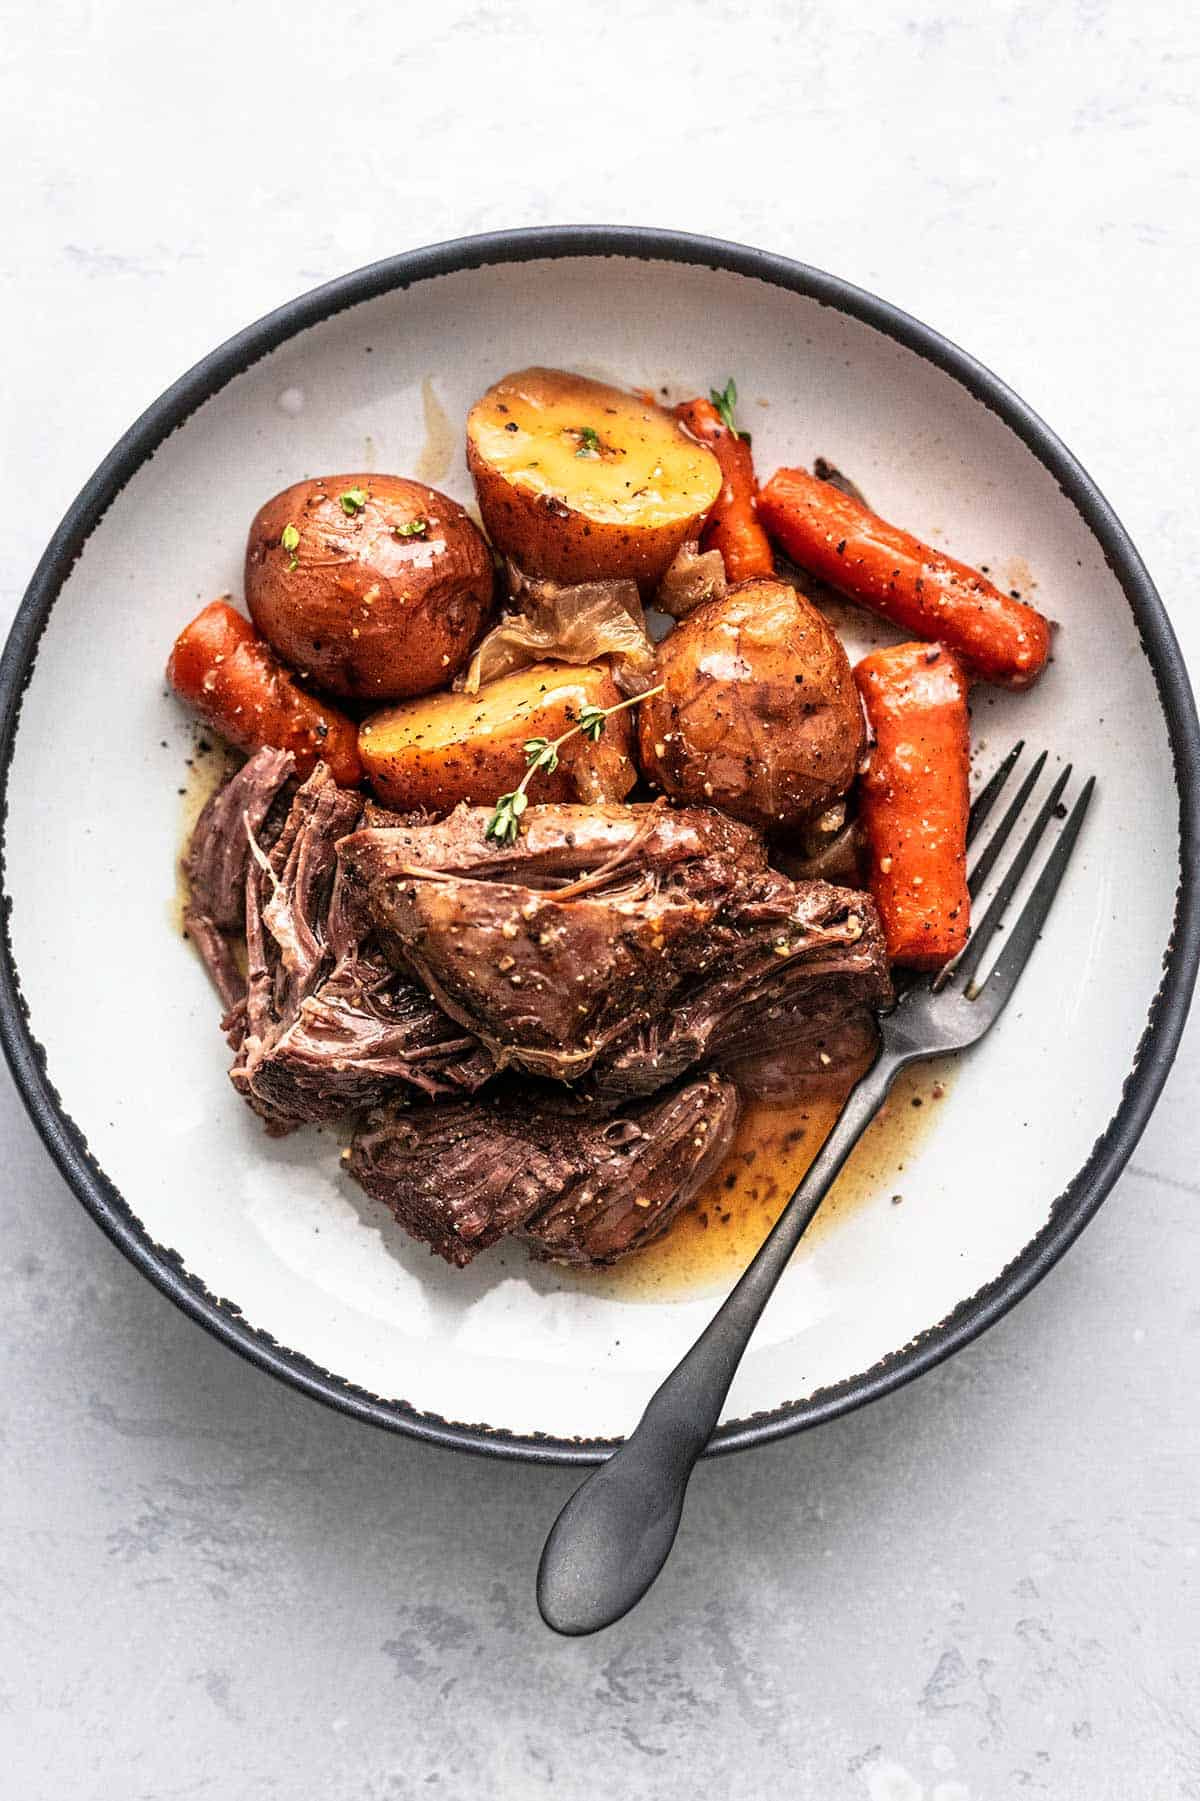
If I’m shredding the roast, I use two forks or gloved hands and gently break it apart, removing any gristle. I then toss the meat with a few spoonfuls of sauce to keep it juicy and flavorful. For plating, I serve it in a low, wide bowl with mashed potatoes or soft polenta, and always include a vegetable with color and texture like roasted carrots or sautéed greens.
A final garnish—whether it’s chopped parsley, fresh thyme, or a splash of lemon zest—adds brightness and balance. Even the simplest roast feels elegant when plated with intention.
Storing and Reheating Stuffed Pork Chops
After years of cooking and storing hundreds of pork chops in restaurant and home settings, I can say that proper storage and reheating are what preserve the quality of your efforts. As soon as the chops cool to room temperature—which typically takes 30 to 40 minutes after resting—I store them in an airtight container. If there’s any leftover sauce or pan juices, I always pour some into the container to keep the meat moist.
When storing in the fridge, the chops last safely for up to four days. If I plan to keep them longer, I wrap each chop individually in foil or wax paper, then place them inside a sealed freezer bag or airtight container. They freeze well for up to three months. Labeling with the date and type of filling helps avoid confusion later, especially when different batches are stored together.
To reheat, I prefer the oven. I place the stuffed chops in a baking dish, add a splash of broth, cover tightly with foil, and reheat at 300°F (150°C) for 15–20 minutes. This ensures gentle, even reheating. The microwave is a last resort, and when I use it, I do so at 50% power, covering the dish with a damp paper towel and checking often to avoid drying out either the pork or the filling.
Stuffed Pork Chops for Special Occasions
Stuffed pork chops are one of my secret weapons for impressing guests without overly complicating the menu. When I prepare them for special occasions—whether it’s a holiday dinner or an intimate gathering—I focus on refinement, detail, and balance. I start by selecting bone-in chops that are thick and well-marbled. These not only offer more flavor but also look more dramatic on the plate.
I often use a more luxurious filling, such as a blend of roasted butternut squash, goat cheese, and sage, or wild mushrooms with gruyère and shallots. The richness of these ingredients turns the humble chop into a restaurant-caliber entrée. I also take time to create a complementary sauce—something like a red wine and rosemary reduction or a brown butter sage glaze.
When it comes to plating, I slice the pork partway through, fanning it open to expose the filling. I place it atop a purée or alongside seasonal vegetables, finish with a small drizzle of sauce, and add a garnish that reflects the flavor of the filling—like fried sage leaves or microgreens. These thoughtful elements elevate the entire experience while still feeling comforting and grounded.
Why This Recipe Works Every Time
This oven-baked stuffed pork chop recipe has worked for me consistently for one main reason: it relies on fundamental culinary principles that never fail. The pork is thick enough to retain moisture during baking. The stuffing is balanced and cohesive—nothing too wet, nothing too dry—and it complements the pork without overpowering it. The oven offers even heat, and the optional sear before baking builds flavor without rushing the cooking process.
Additionally, this recipe is incredibly forgiving. I’ve made it with dozens of filling variations—from classic spinach and cheese to spicy chorizo with sweet corn—and the basic technique still holds. Whether I’m preparing it for a weeknight family dinner or a formal plated event, I know the meat will be juicy, the filling flavorful, and the presentation elegant.
Even more important, the process teaches kitchen fundamentals: seasoning, temperature control, stuffing technique, and plating. It gives home cooks the chance to build confidence while producing something deeply satisfying. That’s what makes it worth returning to again and again.
Adapting the Recipe for Dietary Needs
As a chef, I’ve often needed to modify this dish to accommodate dietary preferences and restrictions, and I can tell you it adapts beautifully. For those avoiding dairy, I’ve swapped out cheese in the filling with blended roasted vegetables or mashed white beans for creaminess. These options add texture and body without the need for cheese or cream.
For gluten-free guests, I simply replace breadcrumbs with crushed rice crackers, cooked quinoa, or even almond flour. These bind the filling just as well and add interesting textures of their own. For low-carb eaters, I avoid rice and use sautéed vegetables or cauliflower purée as the base of the stuffing.
I’ve even made vegetarian-friendly versions by stuffing portobello mushrooms or thick eggplant slices using the same principles. Once you understand the technique—seasoning, moisture control, balance of flavors—you can adjust the recipe in countless ways without losing its integrity.
Pairing Stuffed Pork Chops with Sides and Wines
Pairing food properly is an essential part of being a chef, and stuffed pork chops offer a canvas with a wide range of pairing possibilities. For side dishes, I always consider the type of filling. If the filling is earthy—say, with mushrooms or sage—I’ll lean toward root vegetables or a grain like farro. For brighter fillings, I often pair the dish with lightly dressed greens or lemony roasted carrots to lift the plate.
As for wine, stuffed pork pairs well with both red and white, depending on the profile. If the stuffing includes apples, sage, or similar flavors, I suggest a chilled Chardonnay or a dry Riesling. When using bolder ingredients like blue cheese, mushrooms, or cured meats in the filling, I recommend a Pinot Noir or even a lighter Syrah. What I avoid are overly tannic or heavily oaked wines—they can clash with the delicate texture of the pork.
The goal is harmony. The pork is rich but not overpowering, and the sides and wine should echo the mood—whether it’s warm and rustic, light and bright, or rich and indulgent.
Making It Ahead: Tips for Meal Prep and Batch Cooking
One of the great advantages of this recipe is how well it lends itself to advance prep and batch cooking. When I want to save time or prepare for a busy week, I stuff the pork chops ahead of time, wrap them tightly, and refrigerate them for up to 24 hours before baking. This not only saves time—it also allows the flavors to meld, resulting in a more cohesive final dish.
If freezing, I always recommend wrapping each stuffed chop individually, first in parchment or wax paper, then in foil, followed by a sealed freezer bag. I label and date them clearly. They can be frozen raw or baked, though I’ve found better results when freezing them raw and baking fresh. When ready to cook, I thaw them overnight in the fridge and then follow the same baking instructions.
For large gatherings or batch meals, I double or triple the recipe, assemble the chops in trays, and refrigerate or freeze until needed. This is one of those meals that scales easily and still feels homemade and personal, even when prepared in volume.
FAQ: 15 Real Questions About Stuffed Pork Chops (With My Professional Advice)
What’s the best cut of pork for stuffing?
I always recommend thick-cut, center-cut pork chops that are at least 1½ inches thick. Bone-in chops have a bit more flavor and visual appeal, but boneless work just as well for easier stuffing. I’ve tried both countless times, and the key is thickness—you need enough room to make a proper pocket without tearing the meat.
How do I keep the stuffing from falling out during baking?
I’ve found that overstuffing is the biggest culprit. I keep the filling loose and make sure the pocket is not packed too tightly. If needed, I close the edge with toothpicks, but often the chop holds its shape naturally if I sear it first. Letting the filling cool before stuffing also helps prevent steam buildup and tearing.
Can I prepare stuffed pork chops ahead of time?
Absolutely—and I often do. I prep and stuff the chops up to a day in advance and store them covered in the fridge. This actually improves the flavor, as the seasonings have more time to penetrate the meat. Just take them out 30 minutes before baking to bring them to room temperature.
What internal temperature should stuffed pork chops reach?
Always aim for 145°F (63°C) in the thickest part of the pork (not the filling). I use an instant-read thermometer and insert it horizontally into the meat portion. This temperature ensures safety without drying out the chop. From experience, pulling it at 140°F and letting it rest usually brings it right into the perfect zone.
Can I freeze stuffed pork chops?
Yes, and I’ve done it both ways—raw and cooked. For raw, I stuff and wrap each chop individually before freezing. They thaw overnight in the fridge and cook beautifully. Cooked ones reheat well too, but I recommend using the oven with a bit of broth to maintain moisture.
What are some dairy-free filling options?
I’ve had great results using mashed sweet potato, sautéed mushrooms, or caramelized onions as the base instead of cheese. You still get richness and moisture, but without the dairy. Adding roasted garlic or toasted nuts brings extra flavor and texture.
How do I get a good sear without overcooking?
I use a very hot pan with a thin layer of oil and sear the chops for 2–3 minutes per side before baking. This builds flavor and locks in the filling. I avoid crowding the pan, and I don’t move the chops until they release naturally—that’s when the crust is formed.
Can I use a stuffing mix from a box?
You can, and I’ve done it for speed when cooking for large groups. Just reduce the moisture slightly so the mix isn’t too wet. I often enhance boxed stuffing with sautéed onions, herbs, or even dried fruit to make it feel more homemade.
How can I tell if the stuffing is cooked through?
If the chop is properly cooked to 145°F, the stuffing will almost always be hot enough—especially since you’re baking it in the oven. I do sometimes check the stuffing with a second thermometer to confirm it hits at least 160°F if it contains raw egg or meat.
What’s the best side dish for stuffed pork chops?
I love pairing them with creamy mashed potatoes, roasted root vegetables, or lemony greens. It depends on the filling, but I always include something light or acidic to contrast the richness of the pork. I recommend using sides that complement the main stuffing flavors.
How do I keep pork chops from drying out?
Thickness and temperature are everything. Thin chops dry out fast. I always start with thick cuts and never cook past 145°F internal temp. Resting for at least 5 minutes after baking helps keep the juices inside. Skipping the rest is a common mistake I learned early in my career.
Can I stuff other meats the same way?
Definitely. I’ve used the same stuffing technique for chicken breasts, turkey cutlets, and even large portobello mushrooms. The key is adjusting the bake time and internal temperature depending on the protein, but the stuffing basics stay the same.
What wines pair best with stuffed pork chops?
I usually go for Pinot Noir, dry Riesling, or an oaky Chardonnay, depending on the stuffing. Earthy stuffings pair well with reds; fruity or herbed ones work with whites. I always avoid overly tannic reds—they can clash with the delicate pork flavor.
Is it safe to stuff pork with raw ingredients like eggs or sausage?
Yes, but you need to ensure the internal temperature of the stuffing reaches at least 160°F if using raw meat or egg. I’ve done this many times and just monitor with a thermometer. Letting the filling cool before stuffing also reduces risk.
What’s your go-to filling for stuffed pork chops?
I’ve tried dozens, but I always return to a mix of sautéed spinach, garlic, caramelized onions, breadcrumbs, and sharp cheddar or gruyère. It’s balanced, flavorful, and always a crowd-pleaser. I recommend starting here before branching into bolder variations.

Post Comment